Qualcomm Platform Log Tool User Guide
QWinLog is used to capture the AP and CP logs of Qualcomm platform modules. QPST is used to export dump files. QCAT is used to export pcap files.
Overview
Tool Introduction
QWinLog is a tool specifically designed for log capturing. It currently supports capturing AP/CP logs of Qualcomm platform modules.
Software Installation
QWinLog is a portable software tool, so you only need to depress the tool's zip to a directory on your computer. Please note that the decompression path cannot contain any Chinese characters, otherwise, the tool cannot run properly.
System Requirement
QWinLog is compatible with the Windows 7/10 system.
Hardware Connection
Before capturing logs, please make the following preparations:
Install the USB driver for the Qualcomm series modules.
Connect the module to the computer using a USB data cable.
Power on the module.
Go to the "Device Manager" interface on your computer. If the USB driver is loaded correctly, you should see several ports as shown in the following figure.
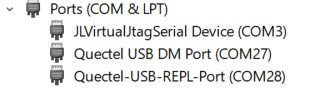

The functions of the ports are as follows:
- Quectel USB DM Port: Used for AP and CP log output.
- Quectel USB Modem: Used for sending AT commands.
- Quectel USB REPL Port: For QuecPython firmware, this port is the REPL port for Python, where you can execute Python codes. Please note that the REPL port name may vary on different platforms. If you are unsure which port is the Python REPL port, you can contact Quectel Technical Support for confirmation.
User Guide
Please make sure that the device has been connected to the PC and all USB ports are enumerated successfully, and then you can configure and use the software tool.
Capture AP and CP Logs
Step 1: Open *QWinLog*
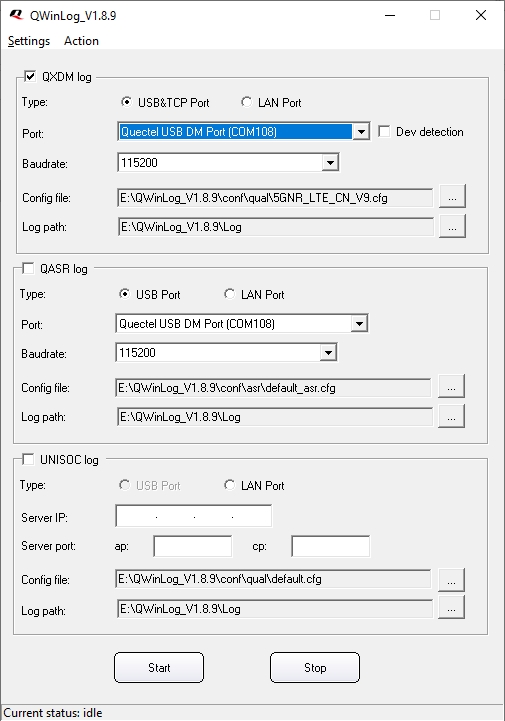
Navigate to the root directory of QWinLog, double click QWinLog.exe to open the tool, and you will see the interface as shown in the figure below.
Step 2: Configure Parameters
Since you are using QWinLog to capture logs of the Qualcomm platform, you only need to configure parameters related to the Qualcomm platform, as shown in the figure below.
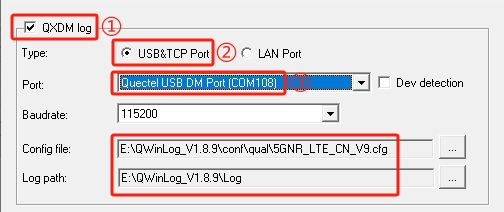
Follow the steps below.
Tick "QXDM log" at position ①. After the tool is opened, this option will generally be ticked by default, if not, please tick it manually.
Select "USB&TCP Port" at position ②.
Click the drop-down button of the "Port" selection box at position ③ and choose "Quectel USB DM Port.
"Config file" is the configuration file used by QWinLog for log capture. You can use the default configuration file provided by the tool or contact Quectel Technical Support for the configuration file.
"Log path" is the path where the captured logs will be saved. You can keep the default setting or modify it as needed.
Step 3: Capture Logs
Click "Start" on the QWinLog interface to start capturing logs. Click "Stop" to stop capturing logs.
Step 4: Package Log Files
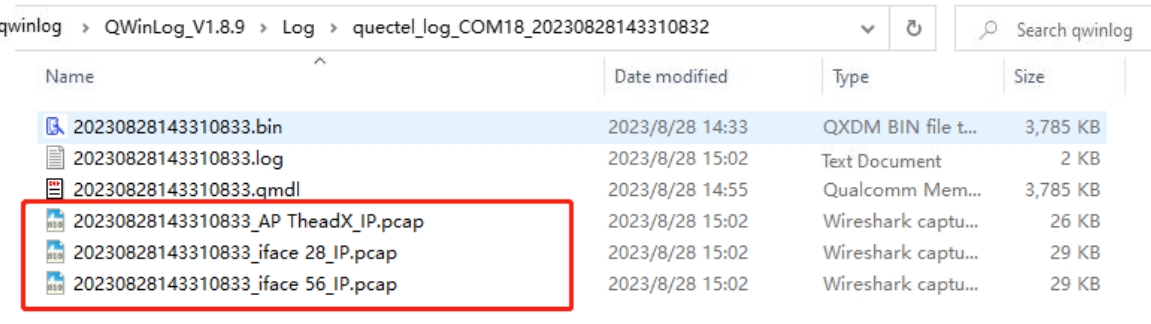
After capturing the required logs, click "Stop" to stop capturing, and then you can find the saved log files in the directory specified in the "Log path" option, as shown in the figure below.

You only need to compress these log files into a zip and send it to Quectel Technical Support or software engineers.
Export Dump Files
To capture and export dump files of Qualcomm platform, you need to use QPST (Qualcomm Product Support Tools). If QPST is not installed on your computer, please contact Quectel Technical Support to obtain the corresponding tool installation package and install it. QPST can automatically capture and export dump files with simple configuration.
Step 1: Configure Dump Mode
Here is how to configure dump mode for Qualcomm platform modules with AT command.
AT+QCFGEXT="dump",1
Open QPYcom, select "Quectel USB Modem" for "COM Port," and click "Open port". Then, send the AT command above.
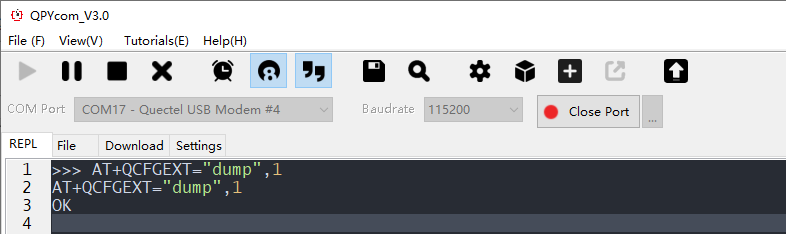
Note: The AT command takes effect immediately and the configuration is automatically saved after the module is rebooted.
Step 2: Open *QPST*
After QPST is installed, navigate to the "bin" folder in the installation directory and double click the "QPSTServer.exe" file to open QPST. You will see the main interface shown below.

If you don't see the main window of the tool, you can double click the earth icon in the bottom-right corner of your computer, as shown below.

Step 3: Add Port
In the QPST main window, click "Ports" at position ①.
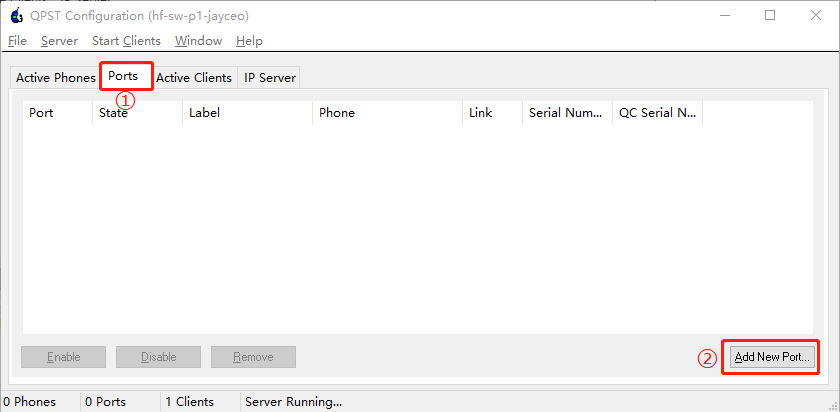
Then, click "Add New Port" at position ②. In the pop-up window, select the "Serial/USB Ports" tab, select "Quectel USB DM Port" and click "OK".

After you click "OK", QPST will automatically open and connect to "Quectel USB DM Port".
Step 4: Reproduce Dump Issue
With QPST configured, you can reproduce the dump issue. When the dump issue occurs, QPST will automatically recognize it and capture and save the dump files.
Step 5: Package Dump Files
After QPST has automatically captured and saved the dump files, click "Help" → "Open Log File Directory" in the menu bar to open the directory where the dump files are saved. QPST will create a sub-folder with the name "Port_COMx" under the Sahara directory to store the dump files, as shown in the figure below.
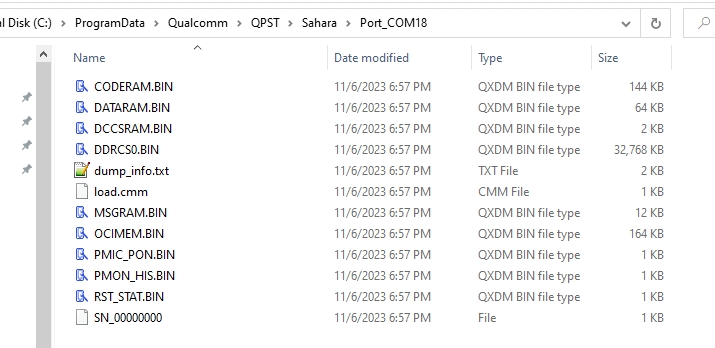
You can compress the dump files automatically captured and saved by QPST into a single zip and provide it to Quectel Technical Support or software engineers for analysis.
Export pcap Files
To export pcap files of Qualcomm platform, you need to use QCAT. If QCAT is not installed on your computer, please contact Quectel Technical Support to obtain the corresponding tool installation package and install it.
Step 1: Capture AP and CP Logs
To export pcap files on the Qualcomm platform, you first need to capture log files in .bin format using QWinLog, following the steps stated in the "Capture AP and CP Logs" section.
Step 2: Modify Log File Extension
Navigate to the directory where the log files in .bin format are saved. Make a copy of the log files and change the file extension of the copied file to .qmdl, as shown below.

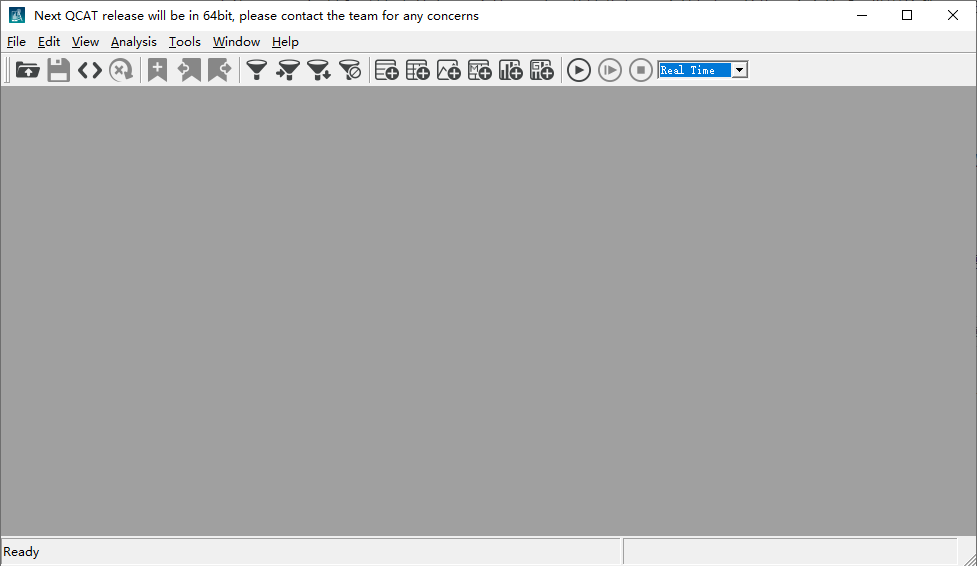
Step 3: Open *QCAT*
After QCAT is installed, navigate to the "bin" folder in the installation directory and double click the "QCAT.exe" file to open QCAT. You will see the main interface shown below.
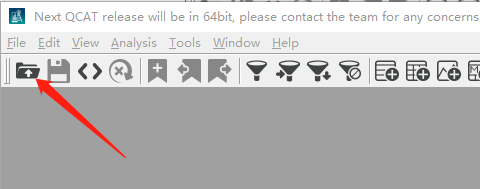
Step 4: Import Files
In the QCAT main window, click the button as shown in the figure below. In the pop-up window, navigate to the directory where the .qmdl file is located, select the .qmdl file, and wait for the file to be imported.
Users can also directly drag and drop the .qmdl file into the QCAT main window to import the file.
Step 5: Export pcap Files
Click "Tools" → "Convert log to PCAP/TXT" to open the following window.

In this window, you can see the path of the input file and the path where the exported pcap file will be saved, which is usually the same directory as the input file. Click "Run" in the above figure to start exporting the pcap file. After the export is completed, go back to the directory where the .qmdl file is located, and you will see the exported pcap file, as shown in the following figure.